433 MHz RC plane Prototype
แสดงบทความที่มีป้ายกำกับ 433MHz แสดงบทความทั้งหมด
แสดงบทความที่มีป้ายกำกับ 433MHz แสดงบทความทั้งหมด
วันจันทร์ที่ 23 พฤษภาคม พ.ศ. 2565


วันอาทิตย์ที่ 14 มกราคม พ.ศ. 2561
433 Mhz Module RC Car{No coding Rx}

The instruction "433 Mhz Module RC Car{No coding Rx}" introduce how to build radio controlled car using 433 Mhz Rx module and L298N dual motor drive module.
For the transmitter instruction,see "433 Mhz Module DIY Transmitter {Tx without code} "
Materials
 2. 1 - Receiver anttenna
 3. Electrical 26 AWG wires

4. 1 - Battery 6-12 V. (Nicad/2s-Lipo/Alkaline)

5. 1 - RC car toy with dual motor(Driving and Steering)
6. 1 - L298N module
 7. Female pin header (2.54 mm. pitch)
 8. JST plug

Tools
1. Soldering gun
2. Soldering wire
3. Soldering paste
4. Screw driver
5. Plier
6. Hot glue gun
Electrical parts Installation


1.Connecting and soldering wires between each equipments as shown in the electrical circuit diagram.

L298N module pin to Rx module
ENA - Vcc
IN1 - D0
IN2 - D1
IN3 - D2
IN4 - D3
ENB - Vcc
MotorA - Driving motor
MotorB - Steering motor
Tx-Rx Binding Method
See video clip here


วันเสาร์ที่ 13 มกราคม พ.ศ. 2561
433 Mhz Module DIY Transmitter {Tx without code}

The instruction "DIY 433 Mhz Module Transmitter {Tx without code}" introduce how to build simple four channel DIY transmitter using 433 Mhz Tx module.This kind of devices in the market using for car/motorbike thief-alarm remote.We can apply them to control RC toy like cars,tracked robots,boats or even airplanes.It doesn't need any programmable controllers or coding sketch.The wireless modules are small and light,good for using to control tiny ground toys,park flyer planes or replacing old broken electronic toy remotes.
Materials

2. 1 - Receiver anttenna

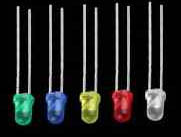
3. 1 - LED 4 mm.
4. 4 - Push button switch

5. 1 - Resistor 1 kOhm. 1/4 watt.

6. 2 - PCB DIY circuit board

7. Angle male pin header (2.54 mm. pitch)

8. Velcro tape

9. Electrical 26 AWG wires

10. Battery 3-5 V. (Nicad/1s-Lipo/Alkaline)

11. 4 - Bolt M2x8

12. 4 - Nut M2

13. 4 - Aluminum Spacer 2.5x6 mm.

14. Female pin header (2.54 mm. pitch)

Tools
1. Soldering gun
2. Soldering wire
3. Soldering paste
4. Screw driver
5. Wrench
6. Plier
Electrical parts Installation


Remote Building
1.Installing each parts on the PCB as showing in the picture.
2.Connecting and soldering wires between each equipments as showing in the electrical circuit diagram.

Push button switches to Wireless module pins :
RIGHT - K1
LEFT - K2
FORWARD - K3
BACKWARD - K4
3.Gluing and paste velcro on both PCB and Battery.
4.Assemble another one PCB at the backside and fixing it with M2 Bolts+Nuts+2.5-Spacers.

สมัครสมาชิก:
บทความ (Atom)